A digital camera sensor (or a particular type of film) will always require the same amount of light for the photo to turn out well. Because different places, different scenes and different times of day all have different amounts of light, we need to control how much of it gets through to the sensor (or film). This is called the exposure.
On most cameras, the exposure is affected by three things:
shutter speed - the faster the shutter moves, the less light gets through
aperture - the smaller the aperture, the less light gets through
ISO setting (or film speed) - the higher the setting (or the "faster" the film), the less light is required for the photo to turn out well.
If too little light enters the camera, the picture is too dark and we say that it is under-exposed. If there is too much light, the picture is too light, or over-exposed.
Exposure is adjusted in stops. Stops aren't fixed units, like metres or kilogrammes, they're more like the intervals in music - each stop halves or doubles the amount of light entering the camera, regardless of how much there was in the first place. If you increase the exposure by one stop then twice as much light gets through. If you decrease the exposure by one stop, then half as much light enters the camera. Increasing the exposure by two stops allows four times as much light to enter the camera, as you're doubling and then doubling again.
Because only certain combinations of shutter speed, aperture and ISO setting will give the right exposure, we know that if we change one setting, we will need to change at least one other. For example, if you increase the shutter speed by one stop, you will need to widen the aperture by one stop to compensate (or double the ISO setting).
Most modern cameras will allow you to adjust the exposure in half-, or even third-, stops for greater control.

The exposure settings you use will vary according to the amount of light falling on your subject. If you're outside you can't always control the amount of light, but there are some things you can do:
alter the direction of the light - it is usually best to have the sun behind you when you are taking a photo so that the subject is lit full-on and there are no shadows. If you are taking a photo of a person you can both turn round so that you're facing the right way, but it's more difficult with a building. You also need to be careful that the sun doesn't shine in the subject's eyes and make them squint.
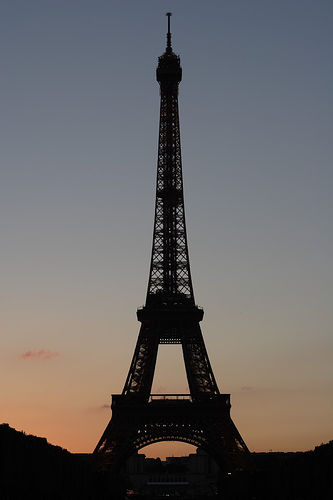
take advantage of difficult lighting - try taking the picture as a silhouette instead, as I did with the Eiffel Tower picture on the right when I got there a bit too late and the sun was going down behind it.
wait a minute - the sun might go behing a cloud or come out from behind one
use extra lighting - you can use a flash outside to light something from the front if the sun is behind them (this is called fill-in flash), or you can use a reflector to reflect light into shadows. You can buy photographic reflectors of different sizes, but sometimes some foil or a sheet of white paper will do.